
At PikeTec, we have a go-to example to showcase our test automation tool TPT: the Lights Controller.
These information are waiting for you now:
- Why such an easy example?
- Main functionality of our Lights Controller Example
- Interfaces of our Lights Controller Example
- Behavior of our Lights Controller Example
- Special Case – Change to Auto-Mode
- Special Case – Change of Light Intensity in Auto-Mode
- Different implementation types
- Where can I find it?
- Quick Tutorial
- Fun Fact
Why such an easy example?
We use what at first glance appears to be a very simple example for several very good reasons:
- Simplicity: The operation of the Lights Controller is easy to explain and understand. It is therefore ideal for focusing full attention on the functionality of TPT.
- Manageable Scope: It provides a clear and concise demonstration of typical implementation mechanisms found in automotive software development, such as hysteresis times, threshold values, adjustable parameters, and internal states.
- Automotive Relevance: The Lights Controller represents a typical automotive function, making it relatable to industry professionals.
Main functionality of our Lights Controller Example
The main function is calculating the control of the headlights. The output values can be on or off. This calculation takes into account two inputs: the position of the light switch and the light intensity.
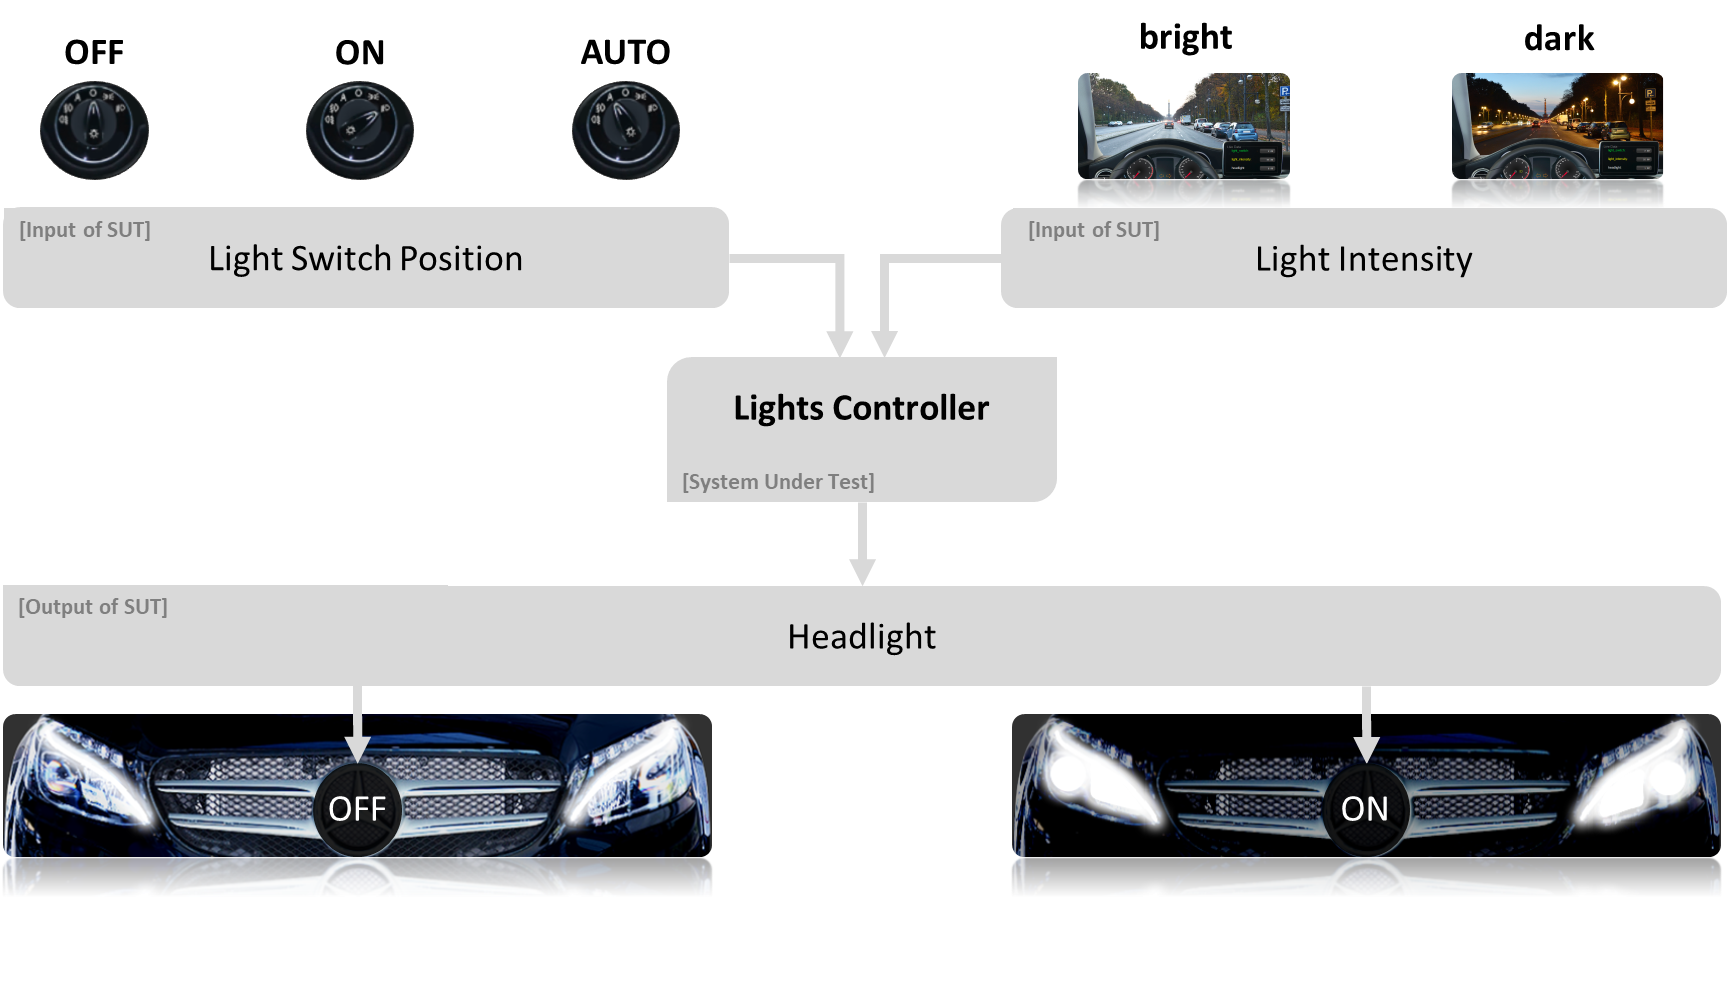
Interfaces of our Lights Controller Example
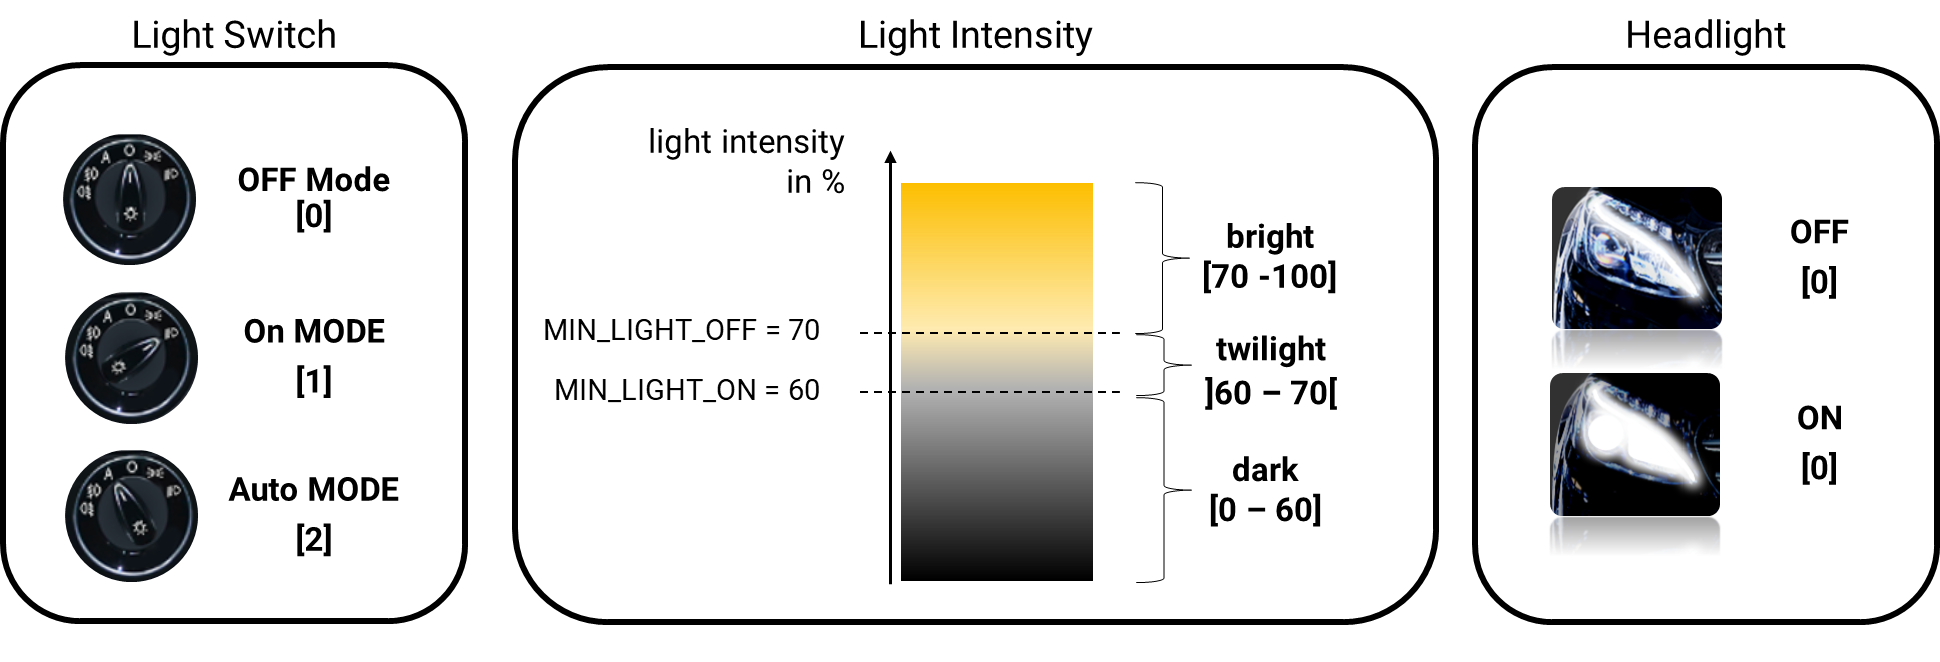
The light switch has three positions: On, Off, and Auto Mode.
The light intensity ranges from 0% to 100%. The Lights Controller internally divides the light intensity into three regions: bright, twilight, and dark, using two parameters: MIN_LIGHT_ON (default: 60) and MIN_LIGHT_OFF (default: 70).
Behavior of our Lights Controller Example

When the light switch is in the Off position, the headlights should be turned off. When the light switch is in the On position, the headlights should be turned on.
Special Case – Change to Auto-Mode
When the light switch is set to Auto Mode from any position, the headlights should be turned on when it is dark and turned off when it is bright.

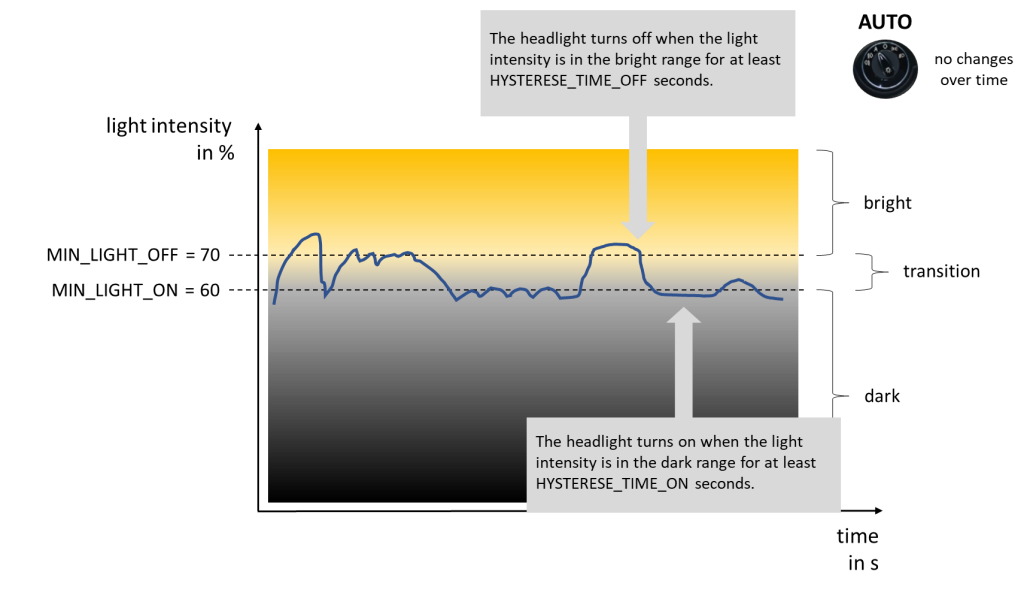
Special Case – Change of Light Intensity in Auto-Mode
When the light switch is in Auto Mode and the light intensity changes, flickering of the headlights (rapid switching on and off) should be prevented.
Instead, the change in the headlights should only occur after a configurable period of darkness or brightness. This ensures, for example, that when driving through an alley with varying shades from trees, the headlights do not constantly switch on and off.
This so-called hysteresis time can be set with two parameters.
- The parameter HYSTERESE_TIME_ON (default: 2s) ensures that the headlights are only switched on when it has been continuously dark for at least 2s.
- The parameter HYSTERESE_TIME_OFF (default: 3s) ensures that the headlights are only switched off when it has been continuously bright for at least 3s.
Parameters are generally intended to adapt the software to the respective system without having to change the software. You can learn more about parameters here: Parameters – One of the Greatest Challenges in Automotive Software Development.
Different implementation types
While the functionality appears straightforward, testing it can sometimes be complex. Getting started with TPT should be as easy as possible for you.
Therefore, we have integrated our lights controller example in different variants (Simulink model, C or C++ code, Autosar software component, and more) directly into our TPT.
To show certain aspects, our example has been extended in some cases, e.g. to show the difference with and without scaled data types. But the main functionality is always the same.
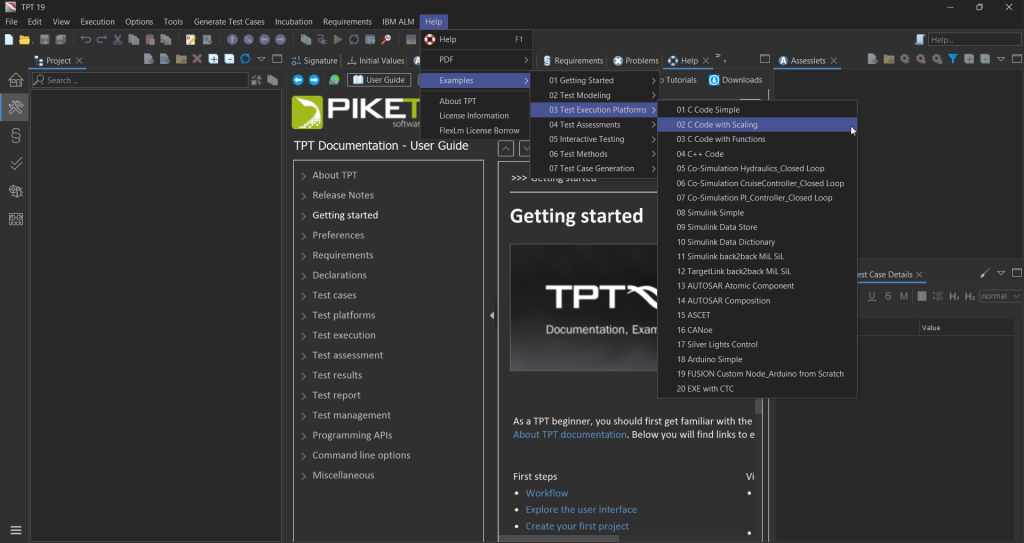
Where can I find it?
You can reach all examples directly in TPT under the tab Help -> Examples. In our TPT User Guide we explain examples additionally.
Quick Tutorial
Here is a short tutorial on how to do it:
Fun-Fact
By the way, we also use the lighting control example to teach new PikeTec colleagues our TPT – and have been doing so for more than 15 years.
So our Lights Controller is probably the most tested program with TPT.
If you want to get to know our lights controller, you can request a free trial license here.